

In this article, we’ll walk you through the process of setting up ticketing and pricing in Vega.. You’ll learn how to configure ticket types, set prices, and manage availability, so attendees can easily purchase tickets while you maintain control over your event’s revenue and capacity. Whether you’re hosting a small gathering or a large-scale event, this guide will help you get everything set up quickly and efficiently.
1. Create your events and save as a draft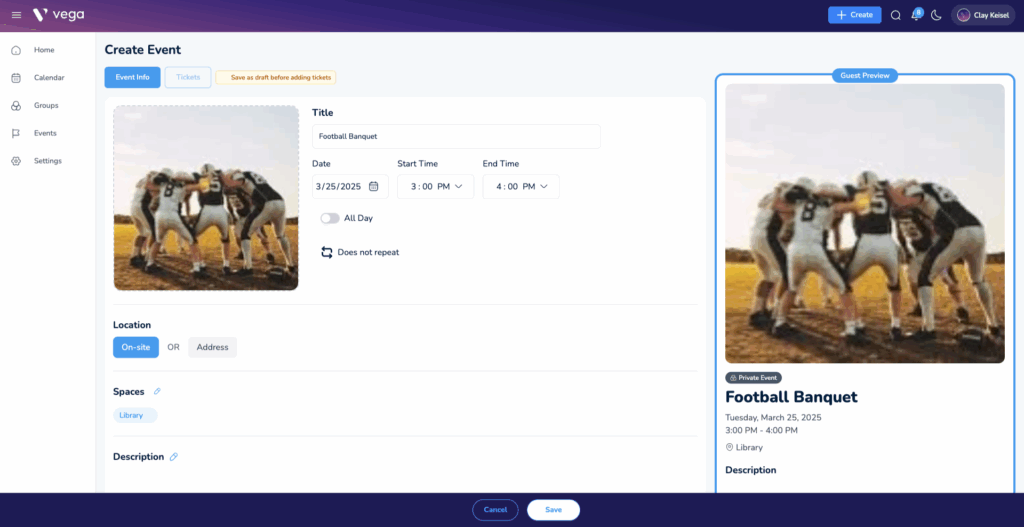
- Start by creating your event and entering basic details.
- Select “Save” to store your event as a draft before setting up ticketing.
2. Enable ticketing
- Navigate to the event settings and select the “Tickets” button.
- Toggle the “Enable Ticketing” option to activate ticketing for your event.
3. Set up ticketing
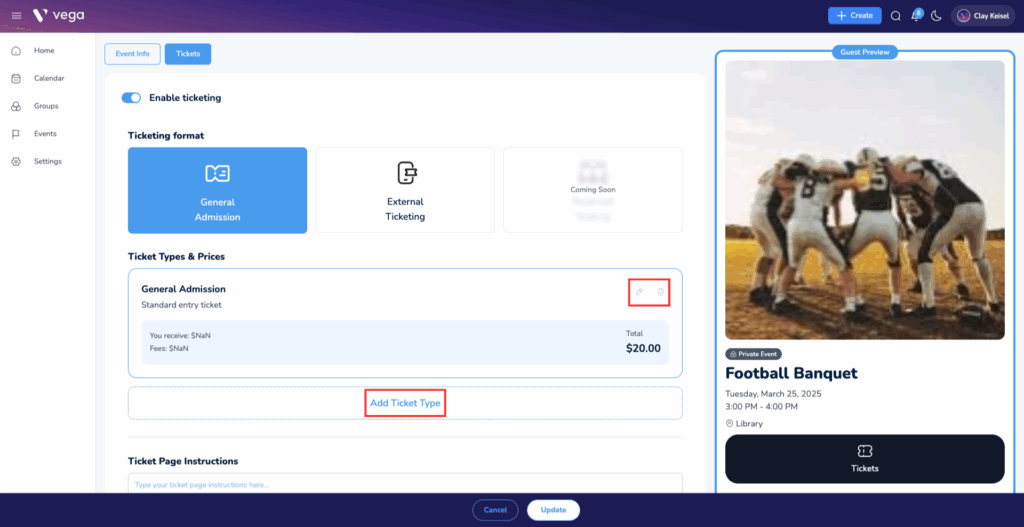
- Configure ticket types, pricing, and availability based on your event’s needs.
- Select the pencil icon to customize ticketing details.
4. Set up pricing
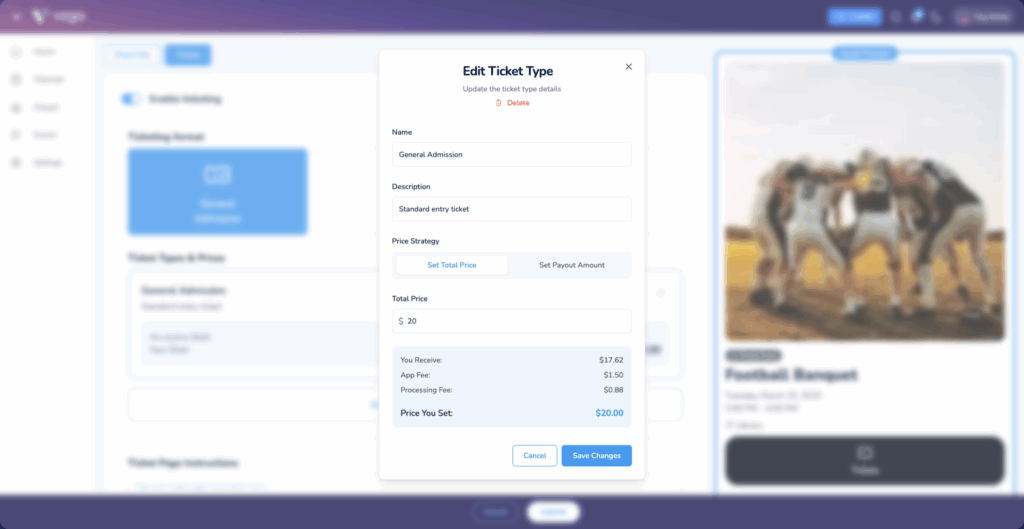
- Enter a ticket name and a brief description.
- Payout Amount – The amount you want to receive per ticket, with fees calculated separately.
- Choose how to set the price:
- Total Price – The full cost attendees will pay.
5. Save your changes
- Once all ticketing details are configured, select “Save” to finalize your settings.
Once you’ve set up your ticketing and pricing, your event is ready to start selling tickets seamlessly through Vega. By following these steps, you ensure that your attendees have a smooth purchasing experience while you maintain full control over ticket availability, pricing, and payouts. Remember, you can always revisit your event settings to make adjustments as needed. Now you’re all set—get ready to host a successful event with Vega!